1. How to register AVCLabs Video Enhancer AI?
AVCLabs Video Enhancer AI is shareware. The free trial version allows you to convert unlimited videos for free with watermark and the length of each exported video is limited to a maximum of 30 seconds. You can download the trial version to see if AVCLabs Video Enhancer AI is your best choice, then purchase a license to unlock the limitation.
Step 1: Launch AVCLabs Video Enhancer AI
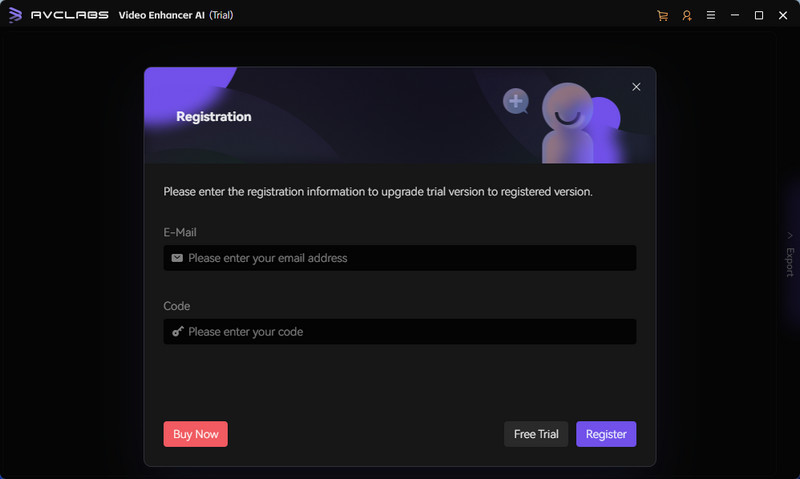
Launch AVCLabs Video Enhancer AI, then click the "Menu" button in the upper right corner and select the "Register" option.
Step 2: Register Video Enhancer AI
Copy & paste your registration e-mail address and the code to AVCLabs Video Enhancer AI.
Click the Register button to complete the registration.
2. How to Use AVCLabs Video Enhancer AI?
AVCLabs Video Enhancer AI is a best-in-class AI-driven solution that provides 3 AI functions: Video Enhancement, Video Blur, and Video Stabilization.
Video Enhancer AI: Enhance video quality, upscale video resolution to 4K/8K, optimize facial details, reduce video noise, and colorize black and white videos.
Video Blur AI: 5 tools to blur any area in your video, designed to help you effectively protect privacy in your videos.
Stabilization: Reduce video shake and instability for a smoother video.
Part 1: How to Enhance Video Quality with AVCLabs Video Enhancer AI?
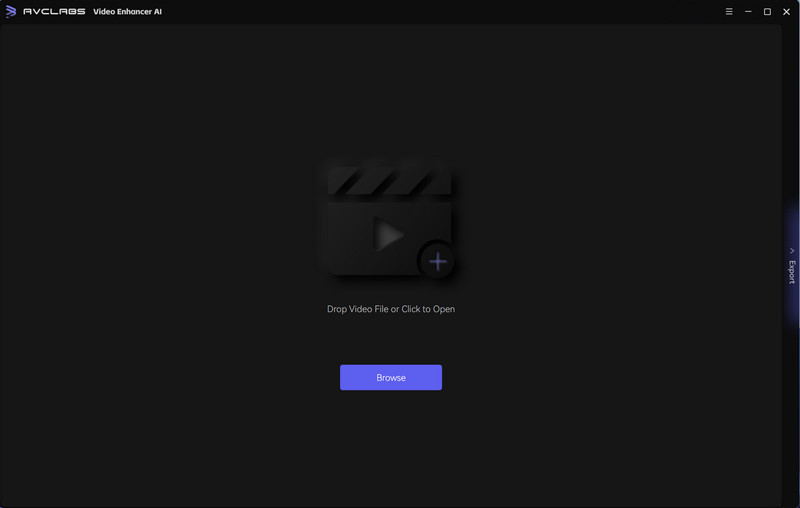
Step 1: Add Source Videos
Click the operation area above to import video files or drag and drop the source files into the program.
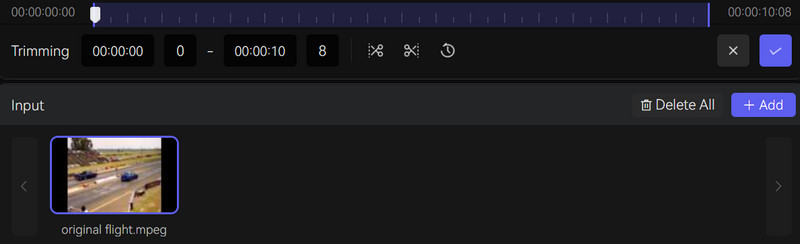
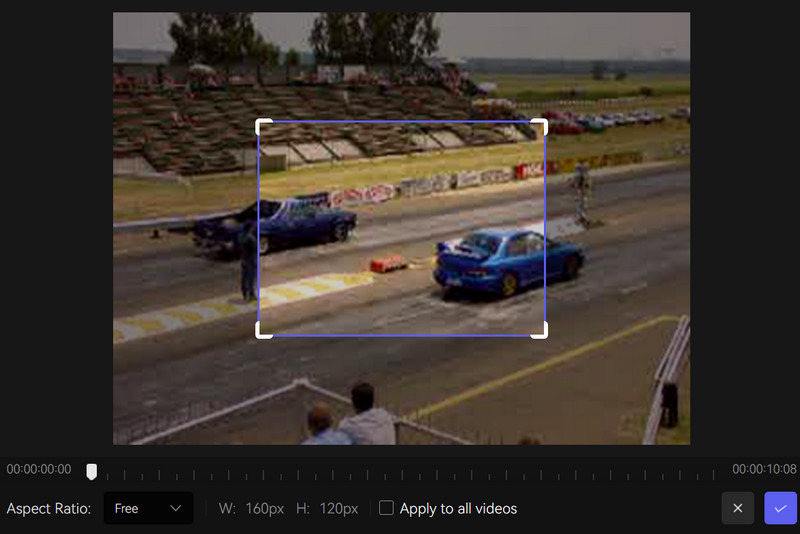
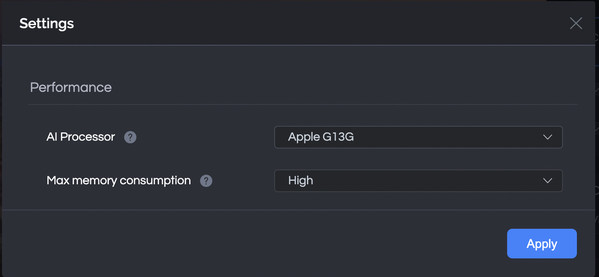
Step 2: Trim or Crop Your Video
(1) Trim: at the bottom panel of AVCLabs Video Enhancer AI, you can trim your video frame by frame by inputting the frame number or dragging the progress bar to select the start and end frame manually.
(2) Crop: at the top panel of AVCLabs Video Enhancer AI, you can click the " " button to crop the video to delete the unwanted part.
(3) Performance: click the " " button to configure the Performance settings: change the AI Processor to CPU or GPU, and change the max memory consumption to Highest, High, Medium, Low, Lowest.
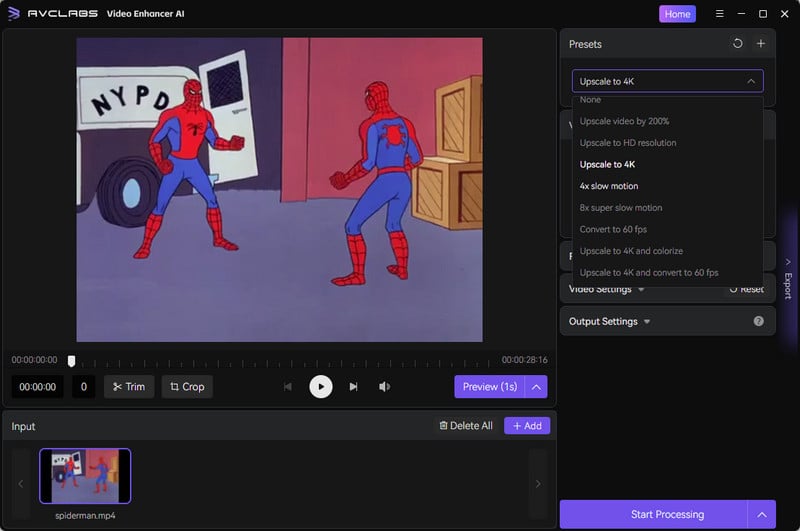
Step 3: Select the Presets
Presets include a list of preconfigured options that you can use right away. You can select one of the ready-made presets as your AI settings.
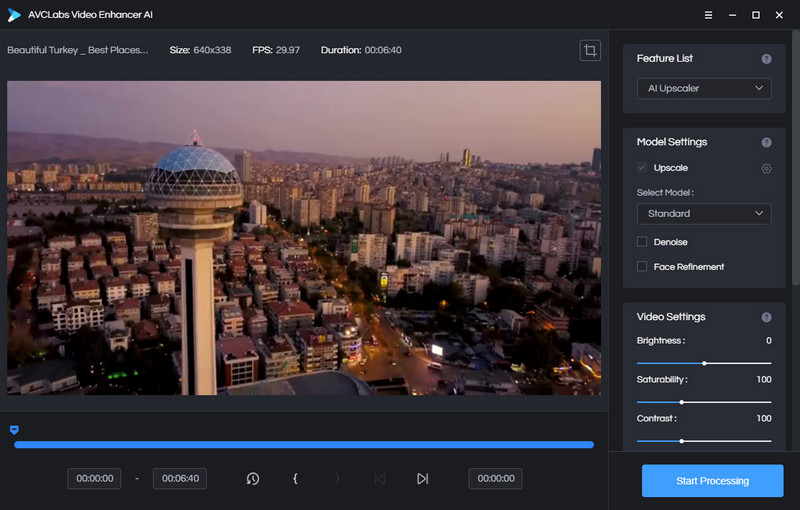
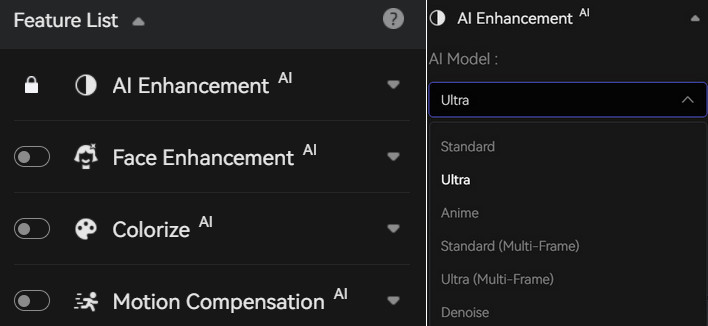
Step 4: Choose AI Model
Currently, AVCLabs supports 4 AI features: AI Enhancement, Face Enhancement, Colorize, and Motion Compensation.
There are 6 models available under AI Enhancement: Standard, Ultra, Anime, Standard (Multi-Frame), Ultra (Multi-Frame), and Denoise.
The models Standard (Multi-Frame) and Ultra (Multi-Frame) are only available for the Windows version.
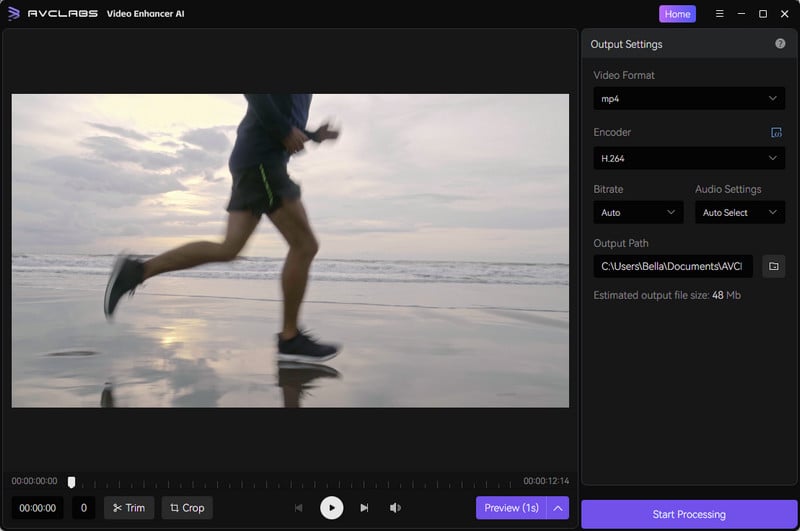
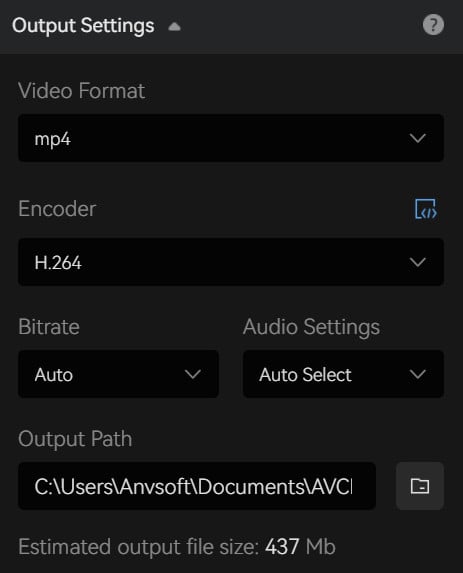
Step 5: Configure the Output and Video Settings
After the model settings, you can start to configure the Output Settings (Video Size, Video Format, and Save Directory) and Video Settings.
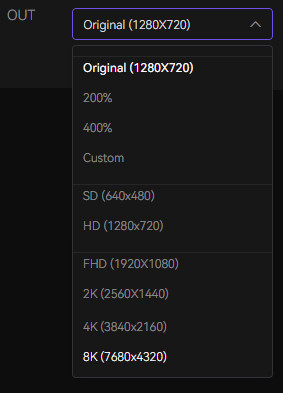
(1) Video Size: you can choose to upscale your video size to 100%, 200%, 400%, or upscale the video resoltion to 720p, 1080p, 2K, QXGA, Quad HD, WQXGA, UHD, 4K, or 8K.
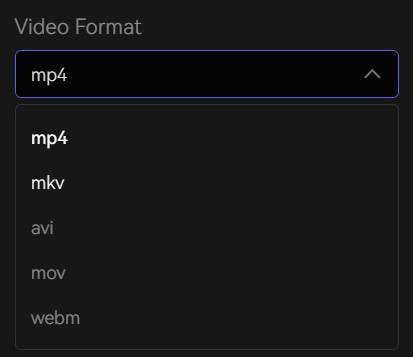
(2) Video Format: you can choose the output format as MP4(H.264), MP4(H.265), MKV(H.264), AVI(Uncompressed), MOV(ProRes 422HQ).
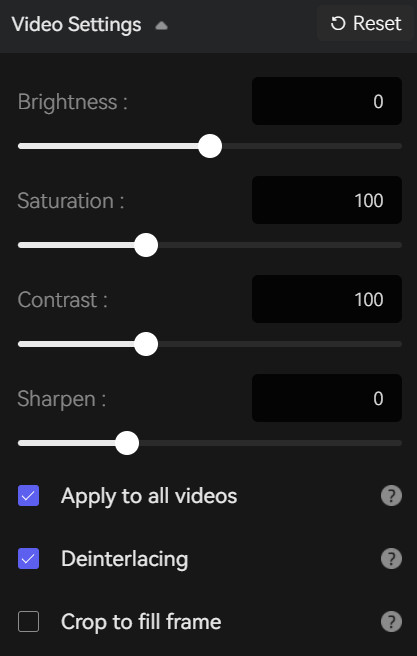
(3) Video Settings: here you can manually adjust the post-processing settings like Brightness, Contrast, and Saturability to achieve the best results, and select the options like "crop to fill the frame" and "deinterlacing".
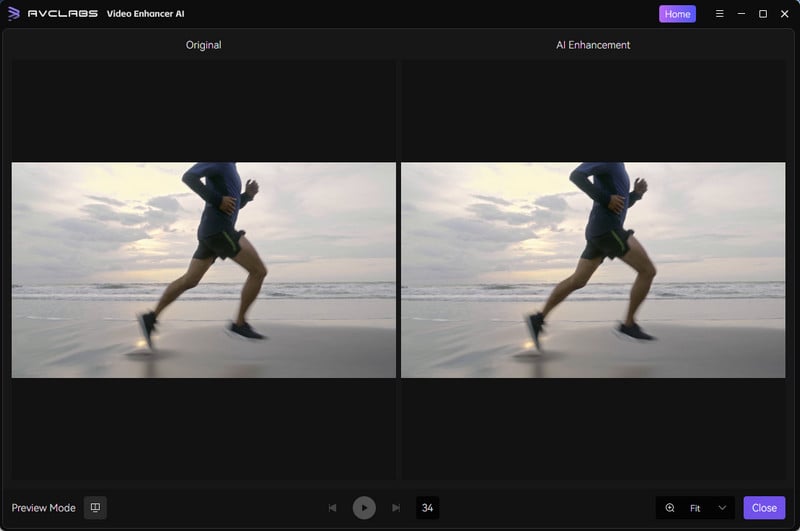
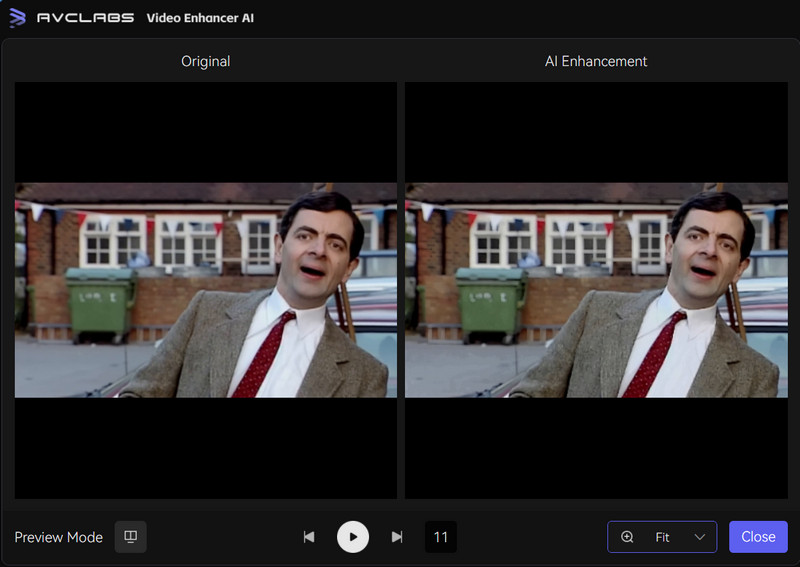
Step 6: Preview Video
Before processing, you can click the "Preview" button to preview the original and AI-processed video.
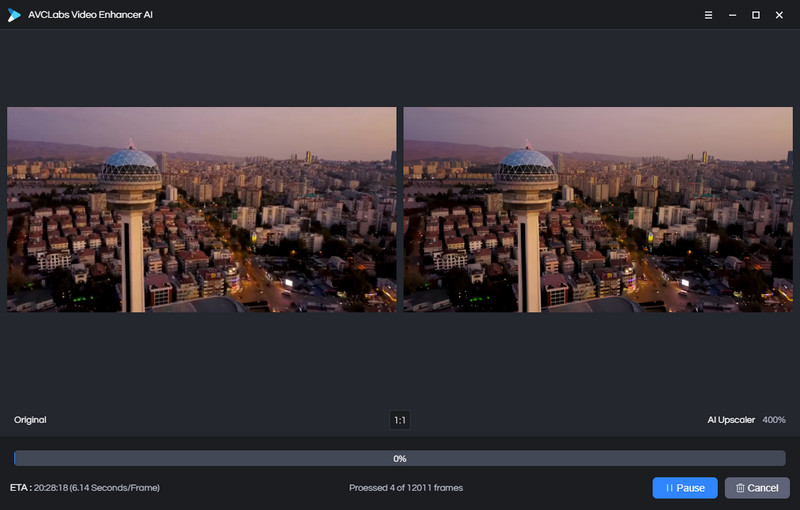
Step 7: Start Processing Video
If you are happy with the result, click the Export button to start enhancing video. After the video enhancement is complete, you can open the file folder and enjoy the final video in a better view.
Part 2: How to Blur Video with AVCLabs Video Enhancer AI?
Step 1: Add Video
Click the operation area above to import video file or drag and drop the video file into AVCLabs Video Enhancer AI.
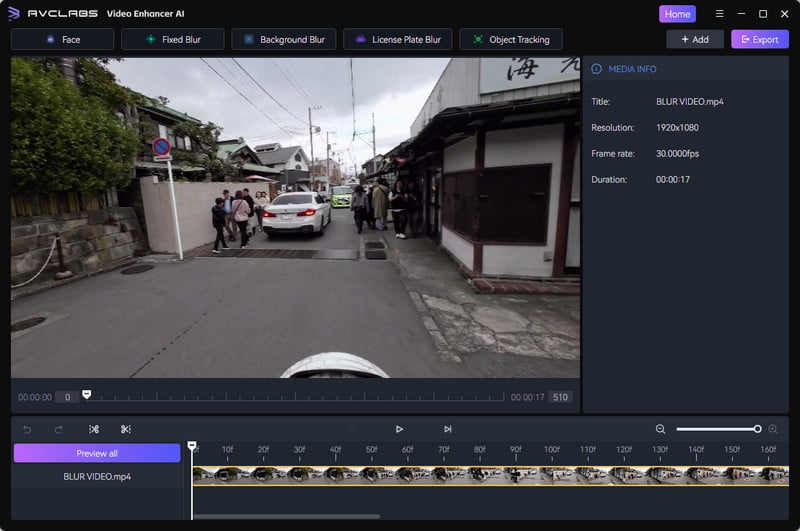
Step 2: Choose Blur Feature
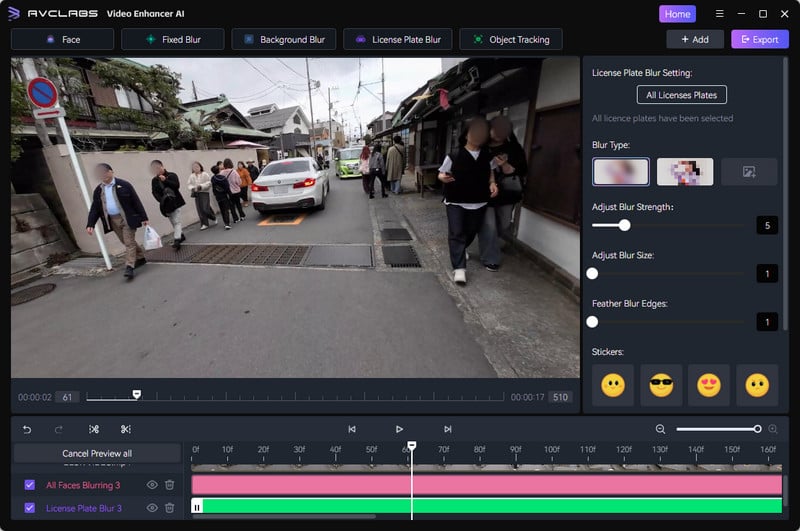
AVCLabs Video Enhancer AI features 5 powerful blur tools, including Face Blur, Fixed Blur, Background Blur, License Plate Blur, and Object Tracking.
To start a blur project, simply click those options to select one or more blur features.

Step 3: Edit Blur Settings
Change the following blur settings according to your needs.
Blur Type: Mosaic, Standard Blur, Longitudinal Blur, Blique Blur, and Particle Blur and custom.
Other Settings: Adjust Blur Strength, Adjust Blur Size, Feather Blur Edges, Advance face mosaic, and Delay face mosaic.
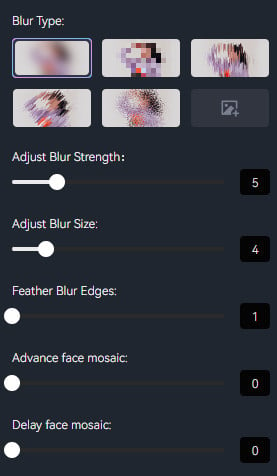
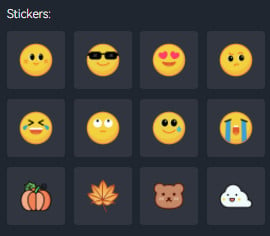
Stickers: For quickly adding blur effects to videos.
Step 4: Preview and Export
When you add blur tasks, you can see the blur effects immediately. Click the eye icon next to each blur task to preview individual blur effects. Click the "Cancel Preview All" button to exit the preview mode.
Once you are satisfied with the applied blur effects, just click the "Export" button in the upper right corner to start the export process of your video blur project.
Part 3: How to Stabilize Video with AVCLabs Video Enhancer AI?
Step 1: Add Video
Drag and drop video files into AVCLabs Video Enhancer AI or click in the blank area to add videos.
Step 2: Choose Output Settings
Set the output settings in the right window of AVCLabs Video Enhancer AI.
Step 3: Preview and Process
Before processing, you can click the "Preview" button to preview the effect. Click the Export button to start stabilizing.